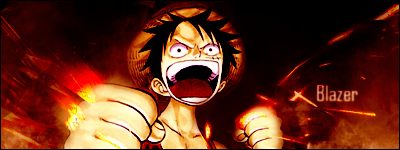


Character Name: Monkey D. Luffy
Display Name: Luffy
Standing: Stands straight up.
Idle: Looks around OR tightens fist and gets a serious face on.
Hold A/Continuous Tap A: Gomu Gomu no Gatling Gun (small damage at a fast rate, low knock-back)
Forward A: Gomu Gomu no Bullet, doesn't stretch much but is rather fast, has knock-back power of Captain-Falcon's forward A (med-low)
Up A: Quickly shifts his body and punches upward, barely stretches at all.
Down A: Shifts body and does a small kick, doesn't really stretch at all.
F-Smash: Gomu Gomu no Bazooka, his charge will be behind his back, as he charges it will stretch more and more however stretch extent won't be too long, has a huge flying impact, damage ranges from 17-28 (min-max charge).
Down Smash: Flips upside down, stands on one-hand, charges up leg in the back, when released he does Gomu Gomu no Muchi and spinds around attack opponents at low altitudes around him. Does anywhere from 12-23 (depending on where it hits, direct hits do significantly more). The knock-back depends on where it is hit, if opponent gets hit by the whole thing it sends them straight one direction but not significantly far, more of a medium distance (something like Diddy Kong's down-smash).
Up Smash: Gomu Gomu no Stamp upwards, charges leg, backwards, when he stretches his leg it can actually go pretty high and thus has a good range, if it hits from the side it has a smaller impact and goes in a diagonal direction, if it hits directly then it's power increases significantly. It can do anywhere from 13-26 damage.
B: Gomu Gomu no Rifle, he charges by spinning his arm and stretching it backwards, once released a huge force explodes and it sends the user straight forward with little verticle height. Damage inflicted depends on how much it's charged, ranging from 10-26 damage. What is special about this attack is that Luffy can run and charge it at once, as well as jump and attack. If he uses it in the air it does 10% less damage and once he is finished he falls back and goes into a partial falling state, where he doesn't have any jumps but can still use his up+B. If he uses it on the ground he is simply pushed backwards after sending the other person flying, the distance is minimal but depends on how much he charges it up. After the attack is a small delay that leaves him open.
Up B: This is used only as a recovery, he stretches his arm rather far (maximum distance is the distance that Sonic's up+B is) to grab the ledge. If the ledge isn't available but somebody is holding on (and isn't invincible), then he can grab the person instead, and he will rocket himself back to the ledge and the other person will be propelled into the stage and bounce back (which with enough damage can be a "stage spike"). If somebody is on the ledge and is invincible, then he ends up falling. :/ Damage is about 14-18.
Down B: Under the following conditions, Luffy can use Gear 2. He must have at least 100 damage or his shield must have broken once. Also, Luffy must have been in his current life for at least thirty seconds; if he is alive for one minute and then uses gear 2, gear 2 lasts for 10 additional seconds. If Luffy meets the requirements he has to pump his blood by holding this button. Once done enough, he will go to Gear 2, which will make him a lot faster and it allows him to use Soru. Soru is used by hitting Down-B, and will make him move fast enough so that he moves behind the enemy. His attacks get stronger by 20% as well and his idle pose becomes his fist pushing against the ground and his blood pumping (gear 2). Also, the words "Jet" are added to all of his moves and they are all executed slightly faster. He goes out of Gear 2 by using Soru a total of five times, if 15 seconds have passed, or if the enemy has been defeated. After he uses Gear 2 he goes back to normal and becomes slightly weaker (by 10%) and slightly slower until he is KO'd. NOTE: He must be on the ground to use this.
Side B: Gomu Gomu no Ami, where he tries to trap the user in a rubber net (leaving himself open) and if successful, he flips backwards (without moving horizontally, meaning it can't be used to SD) and then crushes the foe and releases them, sort of like Bowser's move except with a less high jump.
Aerial A: He spins around while streching his foot and then kicks around him, sending them horizontally, not a huge distance or damage (8-13). He doesn't stretch very far but just enough to make it a decent distance and not simply close-combat.
Side A: Luffy does a mid-air Gomu Gomu no Pistol, same as ground pistol but harder to hit with, it's a generally average move but weaker than it's ground counterpart.
Down A: Gomu Gomu no Yari, he stretches both of his feet down and ultimately spikes anyone who gets hit, unless they get hit on the side. It stretches significantly but can be dangerous due to a little bit of lag in the move.
Up A: Luffy sends a quick Bazooka upwards which propels himself downwards a tiny bit, can be dangerous if done in the wrong spot (if Luffy can't stretch and get back to the stage).
Grabs: He stretches his arm as much as necessary to grab, if there's nobody in range then he just does a quick grab. His forward throw consists of him holding the person with one hand and quickly using Gomu Gomu no Bullet to punch them away. His back throw is his strongest, where he turns around, stretches his arm, in the background, and then launches them, quickly stretching his arm back in place. His up-one simply throws the opponent upwards and is average. His down throw consists of him jumping up and smashing the person to the ground while balancing and holding them with one-hand, then letting the impact move them horizontally. It can be chain-grabbable up to 42 damage.
One good combo to do is to his down-throw while in Gear 2 and then use Soru to warp above them and use Yari to spike them down. It's possible to dodge but not easy, however the chance to do it is rare.
One big weakness is that Luffy's stretching arms can be grabbed if they are close enough to somebody. He can easily be shield-grabbed although his attacks wear out shields a lot.
Final Smash: Gear 3rd
Luffy goes into gear 3rd, blows up his leg, and either does Gomu Gomu no Ono or Gomu Gomu no Muchi. The attack covers a huge area but can be dodged by either moving vertically or horizontally (depending on the attack). If it hits, it sends them flying, usually killing at 35%. The side-effect of it is that after he does it he goes into a shield-breaker moment for about 2 seconds, of which he is slightly vulnerable (but considering that if the opponents DID dodge the attack, they're probably a far distance so it'll be hard to get much of an attack on Luffy before he recovers). The reason why he is slightly vulnerable is because that's how it is in the manga and anime, really. :/